
First off, while our pace of travel has changed since we started this blog, our site statistics still say people are reading and watching our blog, so we plan to continue posting, especially as we head overseas in the coming year.
Now, on to our subject for this post, our van and what we have done to it since we got it! We have been really enjoying our Ford Transit, but we couldn’t help tweaking it to suit us just a little bit better.
Within just a few days of buying the van we installed a dash camera, ham radio transceiver, and 500-watt power inverter. All of these were in our former van, a Toyota Sienna, and were easy additions with a little bit of electrical wiring. It stands to reason why Heather just stood and shook her head as I pulled up floor panels and drilled holes in a van that we (according to the DMV) didn’t even fully own yet. We also noticed that there were no places to hang garments in the van, so two grab handles were added to the rear ceiling just in front of the rear doors that double as locations from which to hang clothes hangers.
If one looks at the picture from our post announcing the van purchase one would notice there is no step on the side. This did not make it impossible to get in or out of the van, but it made for a large first step to get in, especially for small children. This too was an easy fix because we were able to find an original equipment step on eBay. Better yet, the van frame already had the threaded mounting holes, so with just a few bolts the step was ready for use.
Heather and the kids enjoy playing MineCraft with family in Ohio. However, our satellite internet connection causes issues while playing the game over the slow internet. To combat this they have been taking the van to a parking lot in town and using the cellular hotspot on our cell phone to play instead. Yes, the cell phone data speeds are less latent than our satellite connection at the RV. To power the laptops for hours of gaming they use a small gasoline generator and and extension cord run through a door to a power strip. To streamline the process and reduce the stress on the electric cord being repeatedly being slammed in a door, I mounted a shore power connection in the rear bumper and wiring run to a total of 6 120-volt outlets mounted in the side wall of the van interior. These outlets are only active when plugged into a generator or shore power, but that is ok as we also have the inverter if needed for small 120-volt needs while driving. This setup can be used in-motion by ratchet-strapping the generator to a utility tray that mounts to the rear of the van via the 2″ trailer hitch.


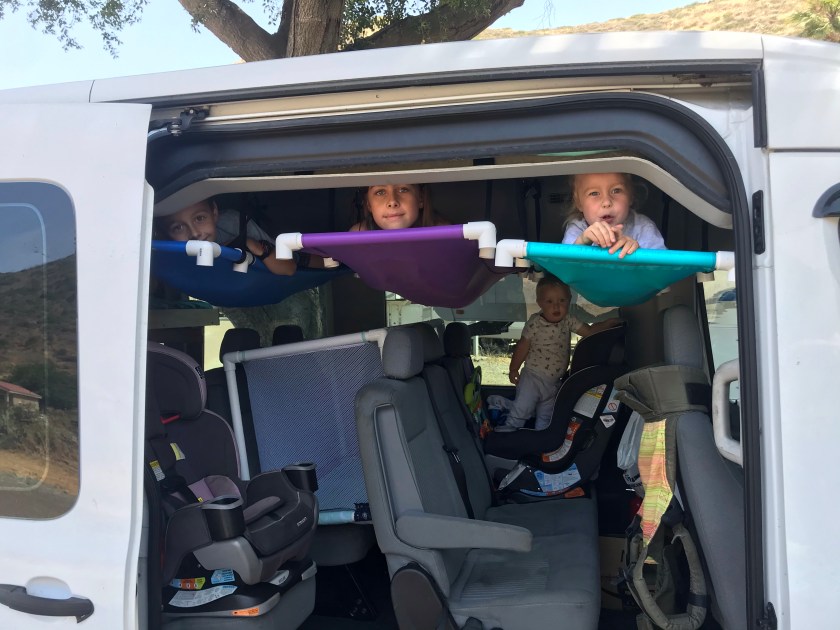
Heather wanted to use the van for some longer road trips instead of always bringing the full RV with us. For this Heather planned, designed, and installed a bed and hammock system all by herself while I was gone on deployment. I have to say, I was pretty impressed when I saw it. The bed platform is made entirely of plywood and allows all 10 rear seats to be installed. There is a bit of an overhang, so the rear 4 seats should be used by shorter passengers, however if the front two slats are removed from the platform a full-sized adult can sit comfortably in the rear seats. The entire bed platform can be removed quickly by simply removing the interlocking slats without unscrewing anything. The side supports can come out as whole pieces and no further disassembly is required. To keep the whole system from sliding around the sides of the platform lock into place around the upright side posts and wheel wells. On top of the wooden slats we placed thin plywood sheeting and a 3″ memory foam mattress topper that we cut to fit the profile of the platform
For the hanging hammocks, Heather removed the interior ceiling panels and bolted Uni-strut to the existing roof cross-members creating a grid framework to hold the weight of the hammocks and occupants. From there she poked eye bolts through the interior ceiling panels and (once the panels were reinstalled) the bolts threaded into captive nuts in the Uni-strut track. From these eye bolts she hung homemade hammocks made from PVC pipe and rip-stop nylon, which she sewed herself. She hung these hammocks with nylon webbing and properly-rated carabiners. The hammocks can be removed and stored on the rear bed platform or strapped to the ceiling above our heads, however this option does obstruct some ceiling lights. For those that notice the white mesh item on the back middle seat, that is Chipmunk’s crib with mesh sides so he doesn’t crawl all around the van before he goes to sleep. It too can be broken down flat for storage. The kids really like the hammocks, and we have used them for a few trips now and they sleep the whole night without complaints.


One drawback of the Transit van is the lack of natural ventilation. You see, only the two front door windows open. That leaves the other 10 seat in the van with only ventilation from the heating and air conditioning vents. This meant that we were running the fan just to have some airflow and not because we needed heat or cooling. To remedy this we installed a 14″ vent fan in the rear roof of the van. This allows hot air to escape out the top and draw fresh air into the van through the front windows. We have a similar vent fan installed in our RV bathroom, but the MaxxAir MaxxFan is built to handle the wind forces of driving and protect against surprise rain showers without the addition of an extra cover. The fan has 10 speeds and an automatic mode that, when activated, will automatically turn the fan on when the temperature in the van reaches 78 degrees. As the temperature continues to rise, the fan will increase in speed through its 10 speeds as needed. When the temperature falls below 78 degrees, the fan turns itself off. After a hot sunny day at the beach parking lot I can tell you the automatic feature is awesome!!! Instead of opening the door to a blast of hot air upon returning to the van, we actually found the van interior to feel cooler than the exterior air temperature. One final note is that the fan took some of the ceiling space that the cargo area ceiling light formerly occupied. The removal of this light left the cargo area a bit darker than I wanted, so two ceiling LED lights were added, one on each side of the fan to provide ample light to the cargo area (not in this picture).


The next question was how to keep our roof vent fan spinning all day while ensuring the van would start the next time we wanted to drive it. The solution was two-fold. First, the starter battery under the driver seat was scooted forward to allow the addition of a second (29-series marine deep cycle) battery under the seat. Special care was required to ensure the battery vent still poked through the floor to vent the battery underneath the van. The deep cycle battery was then attached to the vent fan as well as a few cigarette lighter sockets and anderson power poles for powering auxiliary devices. The second part of this was to ensure the battery would be able to be recharged. For this we added a 160-watt solar panel to the roof of the van and mounted a solar charge controller above the driver seat on the wall.


Wiring was threaded from the roof to the controller and down the wall behind plastic panels to the battery located under the driver seat. While solar will be the primary method of recharging, periods of shade and high device use may result in a need to use an additional charging method. To address this, we added a plug-in charger that uses one outlet on the van wall, so when shore power is connected to the rear bumper it charges the deep cycle battery. This dual-charging setup will allow us to utilize the sun when possible and have a backup charging plan when there is less sun available.
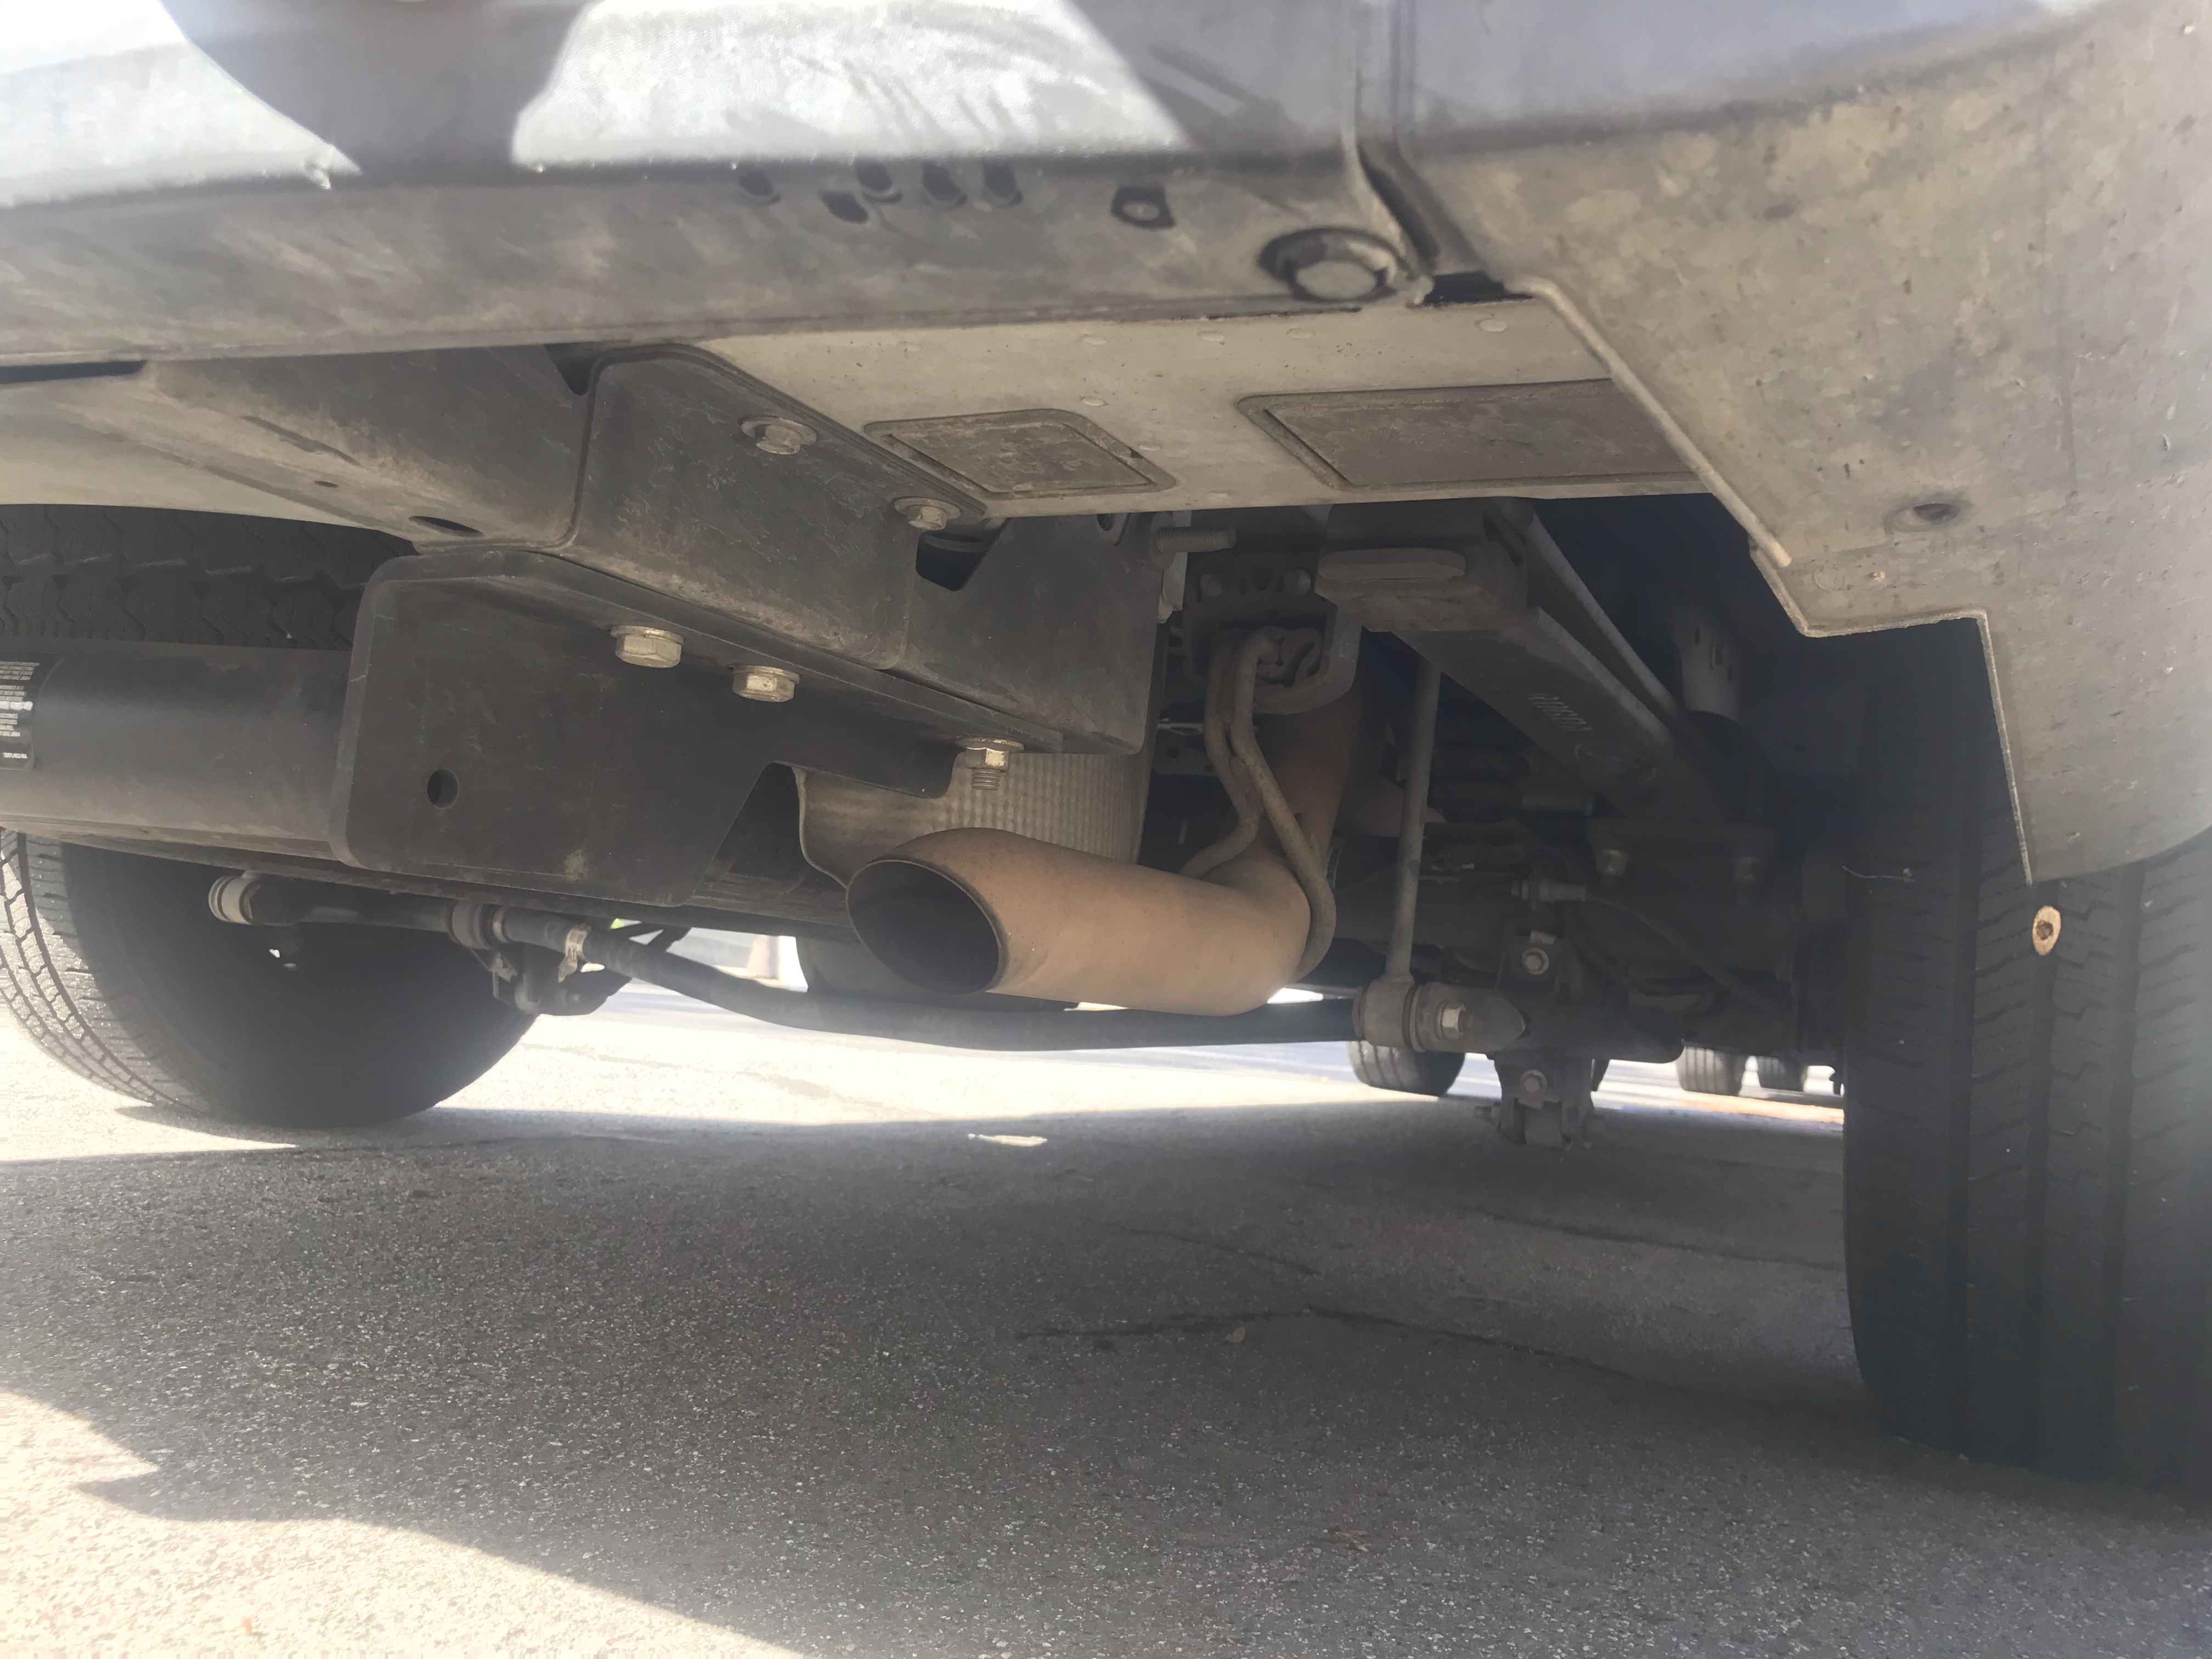

The last modification we made was more mechanical in nature. We had read a number of people voicing concern that the exhaust terminates UNDER the van. While actually driving this is not really a problem, but when van camping or idling for extended periods it could allow carbon monoxide from the exhaust to work its way up into the van. To address this we took the van to a muffler shop and in about 30 minutes they cut, bent, and welded an exhaust extension that comes out the side of the van behind the rear wheel (it is also behind the sliding side door when fully open). We considered just extending it straight out the back, but others had said after doing that they noticed they were getting hit with exhaust right against their legs when loading stuff in the back door if the van was running at the time. For this reason we elected for it to come out the side.

This pretty much cracks me up….it’s a perfect example of why you both are such good friends with Matthew and Elisabeth. You guys think alike!! Great store!
LikeLike